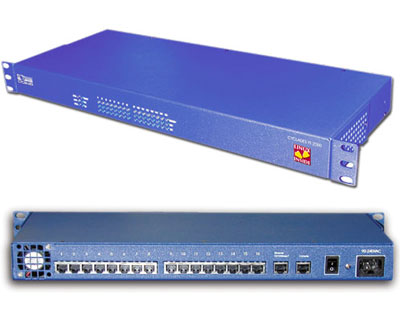
 When I started my consulting firm years ago, we used a lot of Sun hardware. All Sun boxes provide dedicated console access through a serial port (or an RJ45 version of one) allowing you to remotely admin or plug your laptop in without needing a graphics card, monitor and keyboard. PC-based Un*x also has this support but it requires some configuration. I just picked up a Cyclades TS1000 16-port console server that we’ll be using to monitor the serial ports of our VA Linux and Compaq servers.
I pieced together instructions from multiple old documents around the web and this is my step-by-step recap for CentOS 3.x and 4.x. This should work with basically any Linux that has a serial port if you have the right cabling. We purchased all of our cables and adapters from Diana Li at Mirapath to be sure there wouldn’t be any hiccups. No affiliation other than Michael from Bitpusher told us about them. The cables are a combination of standard CAT-5 ethernet and a special female RJ45-DB9 adapter (Cyclades #ADB0036). NOT ALL ADAPTERS ROUTE PINS THE SAME. E.g., the Cyclades adapter routes the wires differently than an adapter for plugging your laptop into the serial port. This can drive you mad when you can’t get any output on your screen. Just spend the $10 and buy a real cable with the right adapter.
- First, edit /etc/grub.conf:
Comment out these 2 lines by putting a # at the beginning of the line:
#splashimage=(hd0,0)/grub/splash.xpm.gz

#hiddenmenu
Add these 2 lines:
serial --unit=0 --speed=9600 --word=8 --parity=no --stop=1

terminal --timeout=10 serial console
And add this to the end of each line that begins with “kernel”:
console=tty0 console=ttyS0,9600n8This tells Grub to direct console output to both the standard ttys (the ones you get with a keyboard and monitor) as well as the serial port (ttySx). The Cyclades was configured for 9600 baud so we stuck with that everywhere to be safe.
- Add this to the bottom of /etc/inittab:
S0:12345:respawn:/sbin/agetty ttyS0 9600 linuxthe “S0″ is just a unique identifier; no two entries in inittab can start with the same thing. 12345 means all run levels (they correspond to /etc/rc2.d, rc3.d, etc) and respawn will ensure that it will accept another login after you log out.
If you had more than one console port that you wanted to use, you could add additional lines like:
S1:12345:respawn:/sbin/agetty ttyS1 9600 linuxNote that the S0/S1 are arbitrary are not related to ttyS0 and ttyS1. It could just as easily be ‘console0′ and ‘console1′.
- If you want to allow root to login over the console (versus logging in as a normal user and su-ing), add “ttyS0″ to the bottom of /etc/securetty:
echo ttyS0 >> /etc/securetty - If you’re running a Redhat variant (CentOS), edit /etc/sysconfig/init and change
BOOTUP=colorto
BOOTUP=serialto prevent the graphical startup from blowing up your terminal.
- If you have kudzu running (use chkconfig or look in /etc/rc3.d to see if it runs during boot), edit /etc/sysconfig/kudzu and set SAFE=yes. This prevents kudzu from hiccuping the serial port while you’re connected to it during boot.
- With the Cyclades, there are special adapters you must use. THESE ADAPTERS WILL NOT WORK if you plug your laptop directly into the console port. For that, you need a “normal” DB9 cable. I use a Keyspan USB-to-serial adapter with Windows Hyperterminal for my Thinkpad since it doesn’t have a serial port which works fine.
- Reboot.
- When rebooting, hit whatever key is necessary to enter your BIOS settings (typically F1 or F2). Many motherboards support redirecting BIOS output to a serial port. This will let you see the entire boot sequence including hardware scanning and verification rather than just the Linux boot process. Look for a Console/Serial setting, maybe under “Advanced” and try to set it to your first COM port (typically COM1 or COM2). When you save and reboot, you should see the output on the console. If not, try the other port and reboot again.
WARNING:
THIS CAN HANG YOUR SYSTEM. On certain older hardware with poor redirection, this can get Grub to hang at loading stage 1.5 or stage 2. If you experience that, you should disable the console redirection. I had to do this for one of my boxes while the others worked fine. Unfortunately for me, I didn’t learn this until after I spent 12 hours debugging, upgrading and reinstalling that server believing it had something to do with Grub and the MBR. The good news is ColdFusion MX survived the upgrade from essentially RHEL3 to RHEL4 without missing a beat.Update – working with Dustin Kirkland, there is a bug filed with Ubuntu and he’s going to try and take it upstream for an acknowledgment/fix.
Extra Credit:
There is a special SysRQ key you can enable through a /proc/sys setting that gives you all kinds of extra kernel-level commands but I haven’t investigated this yet. Any words of wisdom from sysops out there?

 All Categories from Feedburner
Sean Franklin said:
on January 23, 2007 at 6:09 pm
Thanks a million for the great simple straightforward how-to convert it to a console. Everything went perfectly except since mine is a dell laptop, I can’t seem to find in the bios where to redirect the bios to serial. But, I get most of the startup and interactive and even the crude ascii grub menu. Anyway, I wanted to say thanks.